Canva is a free online graphic design tool that helps you create branded designs. While UW–Madison does not have an enterprise license for Canva, we understand that many university employees use it to create social media posts, presentations, posters, and other projects. This tip sheet provides guidance for getting started in Canva with UW brand resources.
Note that UW–Madison has an enterprise license for Adobe Creative Cloud software. If you are familiar with Canva but prefer to use a campus-supported software with the features of a pro account at no cost, check out Adobe Creative Cloud Express.
Tips to stay on brand when working in Canva
Use Brand colors
UW–Madison’s brand colors are instantly recognizable to our audiences. We have colors that are used for print (posters, brochures, flyers, etc.) and colors that are used for digital spaces (social media posts, TV displays, PowerPoint presentations, etc.). Note that the print values below should only be used in Canva. For other print applications, see the Colors page on our Brand site.
| #CD1543 | |
| #FFFFFF | |
| #851B32 | |
| #000000 | |
| #E6E7E8 |
| Digital | |
|---|---|
| #C5050C | |
| #FFFFFF | |
| #9B0000 | |
| #121212 | |
| #E1E5E7 |
Select these fonts
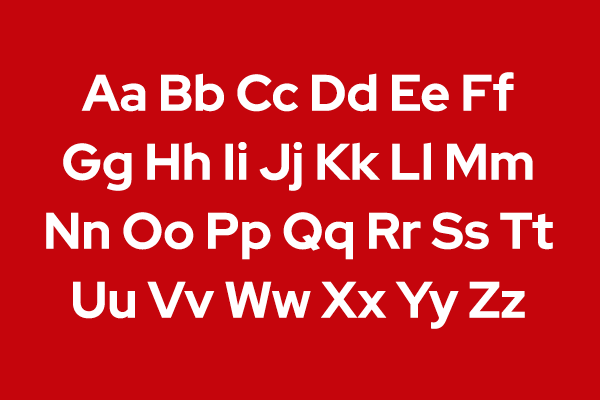
UW–Madison has two primary typefaces: Red Hat Display and Red Hat Text. Red Hat Display should be used for headlines and subtitles, and may be used for body text as well, since Red Hat Text is not yet available in Canva.
For longer paragraph text, we suggest using Crimson Pro. This font can also be used sparingly for titles or subheads.
Utilize campus photo libraries
Professional photos can enhance your work and bring visual variety to your communications, but they must be selected with care, used appropriately, and be relevant to your message. Questions to ask yourself when choosing images:
- Does this photo relate to the content in the material I’m creating?
- Am I using this photo in an appropriate and accurate context? Keep the original context of the photo in mind and ensure that you’re not changing the content of the photo by presenting it in a different or misleading context.
- Has my use changed the original meaning of the photo? The content of a photo must never be changed or manipulated.

The UW–Madison Photo and Video Library is available to campus units and contains more than 20,000 photos for download. For guidance and policies, as well as other campus photo collections, visit our photography page.
Choose from hundreds of graphic elements, icons, and illustrations
We have a ton of fun graphic elements, icons and illustrations available to download on Box in a variety of colors and file types, all helping to keep the tone and look of the UW–Madison brand. They are also categorized by print or digital use, so you know which ones to use for a given project.
Locate your unit’s logo (when appropriate)
Not all materials need a logo. Social media posts, for example, do not, because they come from your account, so your audience knows who you are. But if you’re creating a flyer to hang around campus, adding your logo would be beneficial. You can find or create your departmental logo using the Logo Generator right here on the Brand and Visual Identity site.
How to create your branded Canva project
First, decide if your project is print or digital
Before you start your project, you’ll want to ask yourself whether it will be printed or viewed on a screen. There are other distinctions between preparing files for print and digital that we will not detail here, but for Canva, the best rule of thumb is to use large graphics/photos to keep your designs looking as crisp as possible no matter what kind of material you are creating. Photos that are 1MB or larger will usually reproduce well.
Whether you are creating on-brand digital materials in Canva, such as Instagram stories and presentation designs or a print piece, you can follow the same steps below. You’ll choose a template that matches the type of document you’re looking to create, keeping in mind colors for digital are different from colors for print.
Upload brand graphics and logos to Canva
You will need some time for this initial set up, but once you have uploaded graphics to Canva, they will remain there and be ready for any project you create.
- Look through UW–Madison’s Graphic Elements and Icons. Download and save any of the files that might be useful for your projects. Note: Canva accepts jpg, png, svg, and mov files, so you’ll only want to download these formats.
- Locate your logo, if you plan to use one. If you don’t already have your logo saved, you can go to the Logo Generator and search for, download, and save your logo.
- In Canva, go to Folders > Uploads. Then click on the Upload button and navigate to the folder where you saved the graphics.

Note: You can select multiple files at once to upload. Free Canva users can upload up to 5GB of media.
To add colors and photos, start a project
We’ll use a poster as a print example. In Canva, go to Templates > Marketing > Posters. You can choose to create a blank poster or select one of the templates.
To add one of UW–Madison’s brand colors to your document, look for the rainbow-colored circle in the sidebar. This will open a window that will allow you to add your document colors by clicking on the + circle, and copying and pasting the hex codes in the Brand color section above.

Once you’ve added your brand colors to Canva, you can try color combinations in your document by clicking on “Brand Kit”. Clicking again will shuffle the colors. Alternatively, you can click on an element in the template, and apply colors individually.
To add photos to your document, either download and save relevant photos from one of the campus photo libraries or use your own if they’re high quality and relevant. Click on Uploads > Upload files and navigate to your saved photo(s). Once in the uploads folder, you can click on any image in that folder to add it to your document. To replace a template photo, select the new image in the Upload section and drag it on top of the existing image.
Note that photos on the Internet are typically protected by copyright law and may not be used without explicit permission from the copyright holder. If you don’t know the status of a photo you would like to use, it’s best not to use it.
To change fonts
Use the text tool to highlight or select document text. A text toolbar will appear with options to change the font, size and style. Choose from one of our recommended brand fonts above. You can decide which font weight looks best for your design.
Make it accessible
If you are designing a graphic for digital distribution (email, web, social media, etc.), be aware that you are responsible for adhering to UW–Madison’s Digital Accessibility Policy. See the Center for User Experience’s Make it Accessible guides for more information on how to do that.
Tutorials
Still have questions? Canva provides several tutorials which can help you get started, inspire designs for your project, or take your Canva skills to the next level.


